If you have lot of friends on Facebook (like many of us), managing all can be a task. However, you can simplify friends management on Facebook using ‘Friend lists’ feature. It allows you to organize and group specific friends in different friend lists. Once you create separate lists of Facebook friends like family, Work, Best friends etc – you can interact differently with group of friends in different friend lists.
Create ‘Friend Lists’ to organize friends on Facebook
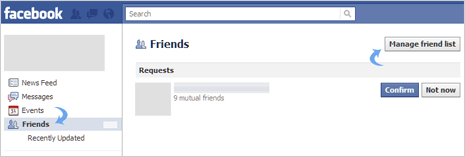
1. Facebook Login into your account and click on ‘Friends’ option on the left sidebar. Then click on ‘Manage friend list’ option at top right part of ‘Friends’ page.

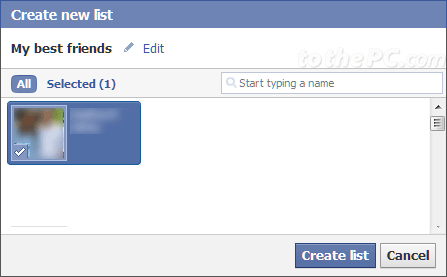
2. Then click ‘+ Create a list’ button at top right part. This will open new pop-up window with title “Create new list”.

3. In the text box at top left with “Enter a name” text – click to type name of the Friend list that you want to create like school friends, best pals, my best friends etc.

4. Then click on Friends name in list below to add them to this Friends List. You can add any friend as per your choice to specific friends list. Then click ‘Create List’ button at the bottom.
5. Your newly created Friends List will be listed on left side. Click on that list and you can add more friends anytime as per requirement and click ‘Save List’ button to confirm changes.
Video: Organize Facebook friends using Friend Lists
Similarly, you can create multiple Friends Lists with specific and selected friends for easy and organized interaction with friends on Facebook.
