Is Microsoft Telenet Client missing on your Windows 7 computer? By default, Telenet client is not available on Windows 7 powered computers. There are number of free telnet software for use on Windows 7. However, if you are fan of traditional Microsoft Telenet client – you need to manually enable it. Fortunately, there is no need of any additional DVD media or software download for installing Telenet on Windows 7. You just need to enable Telenet feature from the Control Panel and Windows will install all required files for Telnet feature on your computer.
Install Microsoft Telenet Client on Windows 7
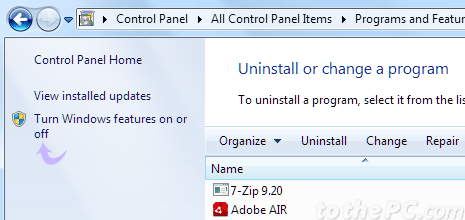
1. Goto Start > Control Panel. Then click on Programs and Features option in the Control Panel window. This will bring up ‘Programs and Features’ window will list of programs already installed on your computer.

2. Click on ‘Turn Windows Features on or off’ option on the left side of ‘Programs and Features’ window. This will show small window with few options.

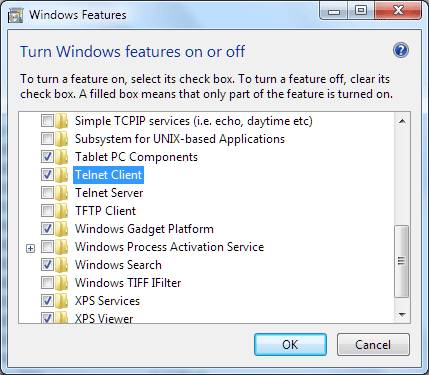
3. Scroll down the list and look for Telenet option. Click to check Telnet Client option and click OK. Then Windows will install required files for the Telenet feature on your computer.
After Telnet install, you can use it using default command prompt window on your Windows 7 computer. Please note: if you get error while activating Telenet client on Windows 7, make sure you are logged in as administrator while making above changes.
