 Sometime easiest of things can bug you. Most of us know the procedure to install things we download on daily basis.
Double click on the dowloaded file and then blindly click on next button till we see the finish button – isn’t it?
Here is back to basics procedure on how to install fonts on your Windows based computer. Pre-installed Windows already have lot of fonts, however you can download and install more fonts for number of creative needs. After you download fonts, here is the procedure to install them:
- Double click on download font and unzip to a specific folder.
- Click Start button and then click Run.
- Type %windir%\fonts and then click OK.
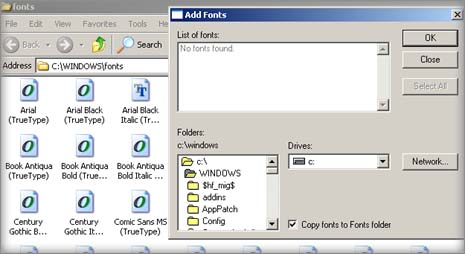
- In new window, click on File menu, click Install New Font.
- Browse and select the location of the font you want to install.
- Click OK and new fonts will be installed.
To test new fonts, open PhotoShop or MS Word and use the font option there to check for new fonts. Procedure to delete fonts is also very easy. Open the fonts folder by following above procedure from step1 to step3. Then select the font you want to delete, right click and then click on delete option in pop-up menu.
What if standard Windows font is deleted? In case you delete standard Windows font accidently, then you can search to download that font by Googling around. Besides, you can also run Windows install again – this should fix the issue.