Gmail has cool feature of filters allowing better management of incoming email messages. You can create filter for different type of parameters for incoming email messages. With filter activated, email messages based on filter rules and settings are automatically sent in specific folder. You can anytime create new filters, edit exiting or delete filter in Gmail inbox.
Create Filters for auto email management
1. Goto Gmail.com & login into your Gmail account.
2. Click on Setting > Filters > Create a new Filter.
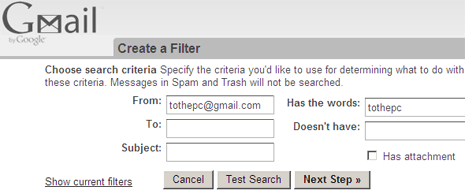
3. Enter the appropriate criteria for you filter.

Example: If you want all the mails from, say tothepc, in the folder labeled as tothepc, then type tothepc@gmail.com in the from field. Also, you can specific word contained in email message like “tothepc”. You can also use ‘has attachment’ and ‘doesn’t have’ option.
4. Click on test search to see the messages matches the criteria & then click on next.

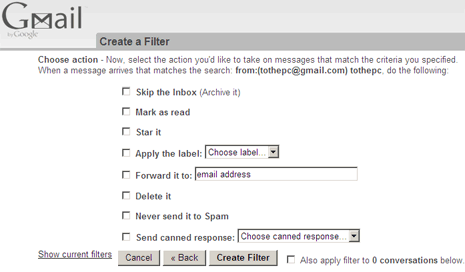
5. Select one or more actions from the list, which will be applied to the messages matching your criteria. You forward messages to specific email ID or specific folder within your Gmail inbox and much more. Explore options that fits best to you requirement. Click on Create Filter button.
From now on, all the email messages that fit in created filter rule will be automatically organized in separate folder, label or forwarded to specific email ID (as per filter settings). Auto email organizing in Gmail inbox, like it?
